
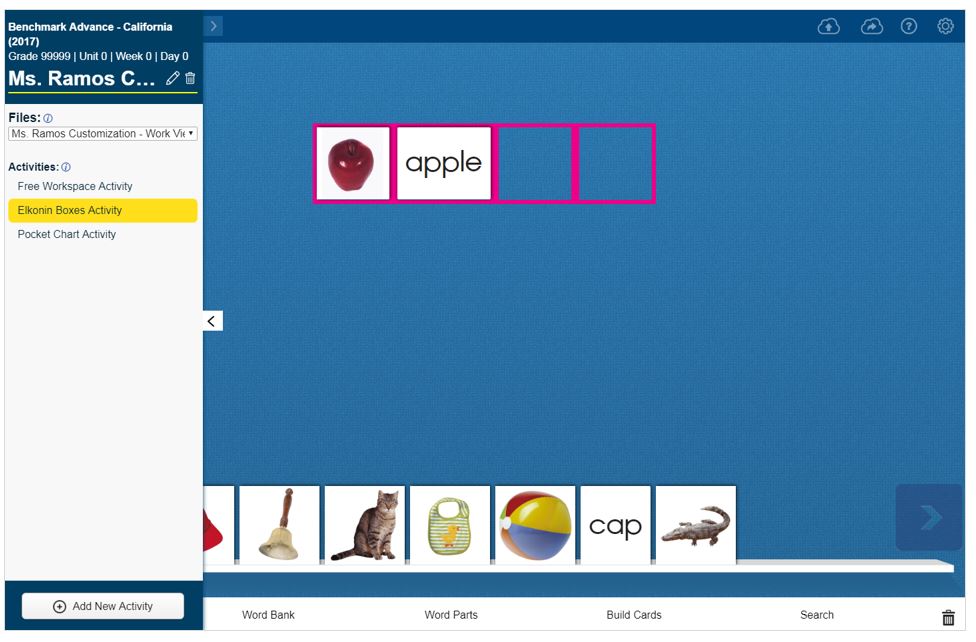
You can use the ePocket Chart Activities panel to create and customize activities. The Activities panel is available when you open any ePocket Chart file from the Library. You can create up to 40 activities per file.

|
Before you start
The Activities panel has the following file types. |
| Type | Description |
| Original File |
A default file that comes with your subscription. Note: This file type can be customized by creating your own activities and saving it as a My Customizations file. |
| My Customizations File | A My Customizations file is a collection of activities that you create and manage. See Create My Customizations files for more information. |
| Activities | Activities are a series of customized ePocket Chart work views that are saved as a single My Customizations file. |
Navigate the ePocket Chart Activities panel
You can create and customize activities by following the instructions below.
Add a new activity
You can use the Info icon next to the Activities heading for instructions to get you started. See instructions below for more details.
- Click the Activities panel arrow. The Activities panel opens.
- Click Add New Activity. The Choose your work view page appears.

- Choose a work view and click OK. The activity appears with a default name that shows the time and date in the Activities section with the Activity name box enabled.
|
|
See Choose your work view or Choose your Elkonin boxes work view for more information. |
- Edit the name and press Enter.
|
|
You are naming an activity that will be part of a My Customizations file. |
- Close the Activities panel.
- Use the Image Bank, Word Bank, Word Parts, and Build Cards options on the toolbar, and the Settings icon at the top right of the work view to customize the activity.
- Repeat Steps 1 – 6 until you have created and customized the activities you need for the My Customizations file.
|
|
Use the Save as (Cloud with right arrow) icon to save the activity or activities as a My Customizations file. Use the Save (Cloud with up arrow) icon to save changes to existing My Customizations files when you do not want to create new My Customizations files. See Create My Customizations files for more information. |
|
|
40 Activities limit A message appears and the Add New Activity, Copy, Save, and Save as icons become dim and inactive when you reach the 40 activities limit. Delete activities you no longer need to create more activities. The Add New Activity, Copy, Save, and Save as icons become active when the activities are less than 40. |
Copy an activity
You can use the Copy icon to copy activities.
- Select an activity.
- Click the Copy icon next to the Pencil icon. A copy of the activity appears at the bottom of the Activities list with a number added to the name to let you know how many copies of the same activity you have.
![]()
- Click the Pencil icon to edit the activity name and press Enter.
- Use the Image Bank, Word Bank, Word Parts, and Build Cards options on the toolbar, and the Settings icon at the top right of the work view to customize the activity.
Edit an activity name
Use the Pencil icon to rename your customized activities until you are ready to save as and name the My Customizations file.
- Select an activity.
- Click the Pencil icon next to the activity name.
- Edit the activity name.
- Press Enter.
Customize an activity
- Use the Image Bank, Word Bank, Word Parts, and Build Cards options on the toolbar, and the Settings icon at the top right of the work view to customize the activity.
Move activity
You can reorganize your activities on the Activities panel.
- Find the activity you want to move.
- Drag and drop the activity to a new location on the Activities section of the Activities panel.
Delete activity
Use the Trash icon next to the activity name to delete activities you no longer need.
- Select an activity.
- Click the Trash icon. The Delete activity dialog appears.
- Click Delete Activity.
|
|
Ensure you have selected the correct activity before deleting. Deleted activities cannot be restored. |
Assign an activity
- Find and select a customization file with activities from the Library.
- Click the Assignments tab.
- Name the Activity assignment.
- Drag and drop the customization file with activities to the Materials Assigned box.
- Type instructions in the Instructions box.
- Select groups and/or students.
- Type or select a start and due date.
- Click Save.
|
|
Students have limited use of the Activities panel during an assignment. Students can only work on the activities assigned and mark them done. They cannot add new, rename, copy, or delete activities you have assigned them to work on. In addition, they cannot view or open any customized activities that they have created during an assignment. |
See Create an assignment for more information.